Saturday, September 25, 2010

A little motor prep work

Justin and I went out this afternoon and decided to find out what the top end looked like.  Seeing all the pistons and heads on the internet that were just completely mangled, and cylinders all scraped, I was scared to see what it looked like.

Well I was pleasantly surprised too see this:


and this...


All in all I was impressed with the condition of both, the piston has some carbon buildup on it, but it and the walls are in great shape.


Next we took out the reed valve...I'm assuming it is OEM, but the reeds look real good also.  From what I have read, the reeds should be what they look like in the pictures below.  I anyone sees something wrong with please let me know, I have never messed with reeds before.


The next thing we did was clean the HPP valves, quite dirty, but cleaned up pretty good.  Everything seems to move smoothly and there are no apparent signs of damage or anything.  Forgot to take a "dirty" picture of the right side, but got one of the left.  So here they are right (clean), left (dirty).  Cleaned them up with a toothbrush and some brake cleaner.


I guess the only thing that concerns me about the motor is in the pic below...there are some cracks in the area of the rear motor mount.  I'm not sure if they are just paint cracks or actual cracks.  What do you think?


Bearing play on the crank felt good, just a very little bit of side-to-side play, but if I tried to twist it there was nothing.  Anyone knows the correct way to check please let me know!

Tuesday, September 21, 2010

Another step forward...

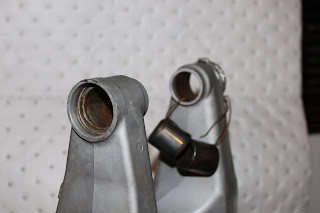
We took the swing arm to Vic at VORFAB, here in Mountain Home, to have the bearing sleeves pressed out.  Vic has done some work for me on one of my other vehicles, and does an excellent and quality job...anyways...he got them pressed out, and for only $10 at that!  That price is probably waayyy cheaper than I would have got a the local Yamaha stealership.  Here is the result of them being taken out, needs a little clean up, but all in all it looks good.


I also went and took everything off the swing arm and cleaned it all.  The chain adjustment blocks took some work to get working good.  Finally have them where they screw all the way in and out (like I think they should be at least).  All in all it turned out really nice, just need bearings now.

Tuesday, September 14, 2010

Progress on the bearings

Justin and I went out today, de-greased the frame and washed it off real good...tying to get it ready for paint.  Just need to have it sand blasted now.

We managed to get the bearings out of the shock link, by first using a brass drift punch for one side and a homemade bearing press for the other.  I had my doubts when trying to get the first side out, the lip of the bearing kept breaking off, but with some persistence it finally came out.  The homemade tool made it super easy to get the other side out. Here is a pic of the tool.


The tool is made from a continuous thread bolt, a 1 1/4" pipe, a socket, washers and 2 nuts.  The oversize pipe is used to catch the bearing when it comes out and to act as the other side of the press.

Also in the picture are 2 races and 1 bearing.  They came out of the steering stem neck.  We are going to have to take the steering stem and swingarm to have the bearings pressed out.  The swingarm bearings are too corroded to be able to press out with what we have at home.

Until next time!

Friday, September 10, 2010

The beast is out!

Well after taking the hammer to it a few times, I realized that the 1/8th of movement wasn't what I thought it was.  I was looking at the space on each side where the frame fits into.  So...realizing that the bolt will be changed out anyway, I decided to go ahead and hack-saw it off.


Didn't take more than a couple minutes each side, and once I had the link out, the bushing inside just fell out with the remainder of the bolt.  The link cleaned up nicely, now just to figure out how to get all the bushings/bearings out of the links and swing arm.

I bought a continuous bolt with a bunch of washers and a 1 1/4 pipe that I'm going to make into a bearing puller/press...hopefully it works.  Got the idea from a post on a website, although I can't remember which site it was...I can't take credit for the idea.

Tomorrow we clean the frame and get it ready to be media blasted then powder coated...

Thursday, September 9, 2010

Meh...

Not much to update really.

So far I have applied PB Blaster to the stuck bolt everyday, and added a large amount of HAMMER to it also.  It has moved, but not very much.  Going to keep at it though, and if worse comes to worse we will most likely wind up cutting it off and getting a new link and bolt.  Hope it doesn't come to that, but one's gotta to do what one's gotta do!

Until next time!

Sunday, September 5, 2010

Tear down almost done!

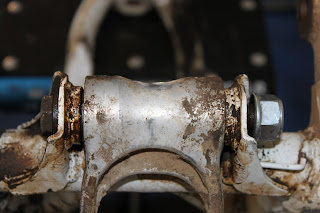
Well we hit it again pretty hard, and we are now down to one stubborn bolt.  The offending bolt is on the rear shock linkage as seen below...


So now let the series of PB Blaster applications and beatings begin!  I can get it to move about on eighth of an inch but thats all.  Hopefully tomorrow I will have more success at getting it out.

Well this is how the old bike looks now, kinda scary for us, being our first time and all, hopefully all turns out well in the end!!  Ready to be cleaned, sandblasted and painted red and put back together...of course that's after we replace all the bearings and top end.


I think my garage may be starting to look like my Dads...Stay tuned!

Saturday, September 4, 2010

It has begun!!

This the first rebuild we have ever done...wish us luck!!  We started the tear down around 5pm yesterday and by 8pm, we had the engine completely removed.


When we first go the bike, the swing arm bolt was ceased pretty good.  But from the time we bought it, I had been applying PB Blaster to it, and when it came time to remove it, it came out pretty easily.  Took a look at the swing arm bearings, and the innards of them fell out in my hand...

Right Side


Left Side


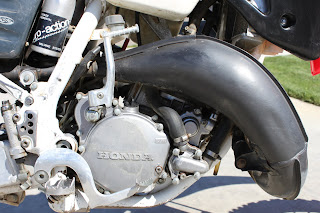
The engine itself looks to be in pretty good shape, one of the previous owner changed out the stator cover and put a Boyeson Factory Racing cover on it...I like the look of OEM my self, so we may change that out


The top  for the case saver has been broken


Taking a look at the radiators, they have both taken a beating.  The left one more so than the right, but they still hold coolant with no leaks!  Hopefully we will be able to send them out to a place in Utah that fixes them (at a reasonable price from what I hear).


Next we will finish removing the sub-frame, swing arm, forks and anything else that is attached to the frame so we can prep it for paint.  Then we will start replacing bearings, and putting a new top end on the motor and fixing anything else we need to.

A few pictures first

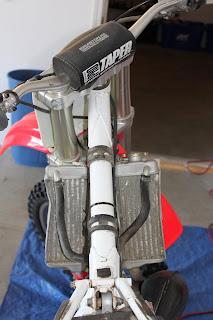
Thought I would add some pictures of the bike in the before stage of rebuild.  The only thing that has been done to bike so far is a new throttle cable and new plastics...other than that what you see is what you get!


Next is the tear down...

Friday, September 3, 2010

The Bike


This is Justin's 1996 CR125R, that he bought in July of 2010. The bike is in pretty good shape, considering it is 14 years old. Everything seems to work as advertised, but the engine is a little weak...pretty sure the previous owner(s) never changed out the piston for a new one.

As this Blog goes on, I will document it's tear down and rebuild. We started the tear down portion today (3 Sept 2010) and don't expect the bike to be ready until next spring or so. It will be a budget build and we don't plan anything extravagant. Here is a list of items that we are planning or getting done:

  • Have frame powder coated...Justin thinks he wants to paint the frame red
  • Replace bearings on the rear suspension/linkage
  • Replace bearings on steering stem
  • Replace piston with new OEM piston
  • New chain/sprockets
  • New pipe/silencer